Google Tag Manager (GTM) is an essential tool for marketers, developers, and web analysts looking to streamline tag implementation and data tracking. With GTM, you can manage multiple tracking codes without manually modifying your website’s code, making it an efficient and scalable solution for digital analytics. In this guide, we’ll explore everything you need to know about GTM, from setup to advanced configurations.
Why Use Google Tag Manager?
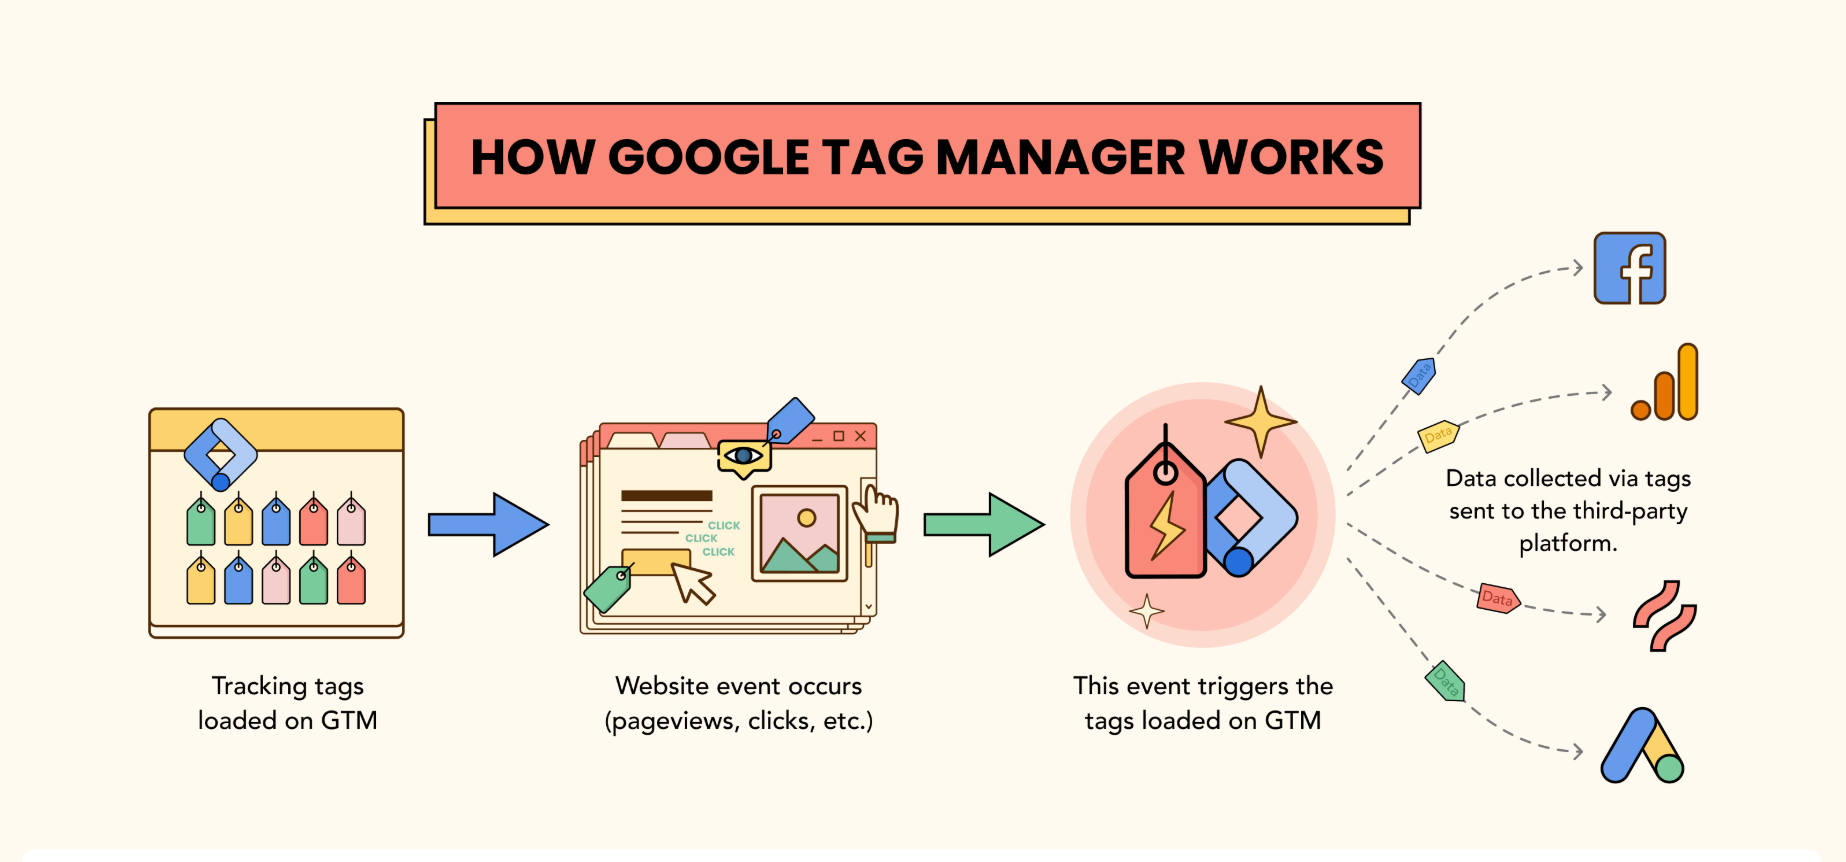
1. Easy Tag Management
GTM allows you to manage all your tracking codes (tags) from a single interface, eliminating the need to edit website code repeatedly.
2. Faster Deployment
With GTM, you can implement and update tracking scripts instantly, reducing reliance on developers and accelerating marketing campaigns.
3. Improved Website Performance
Since GTM loads tags asynchronously, it minimizes page load delays, ensuring a smoother user experience.
4. Enhanced Tracking Capabilities
GTM integrates seamlessly with Google Analytics 4 (GA4), Google Ads, Facebook Pixel, and other third-party tools, enabling precise tracking of user interactions.
5. Version Control & Debugging
GTM provides built-in version control, so you can roll back changes easily. The preview mode allows you to test tags before publishing, ensuring accuracy.
How to Set Up Google Tag Manager
Step 1: Create a GTM Account
- Visit Google Tag Manager and create a new account.
- Set up a container for your website or mobile app.
Step 2: Install GTM on Your Website
- Copy the provided GTM container code and insert it into your website’s
<head>and<body>sections. - Use Google Tag Manager for WordPress plugins if applicable.
Step 3: Add & Configure Tags
- Navigate to the GTM dashboard and create new tags.
- Common tags include GA4 Configuration, Facebook Pixel, and Google Ads Conversion Tracking.
Step 4: Set Up Triggers & Variables
- Define triggers (e.g., clicks, form submissions, page views) to control when tags fire.
- Use built-in and custom variables to pass dynamic values into your tags.
Step 5: Preview & Publish
- Use GTM’s Preview mode to test your setup before deploying.
- Once verified, click “Submit” to publish your changes.
Advanced GTM Features
1. Custom Event Tracking
- Track interactions like button clicks, video engagement, and scroll depth without modifying site code.
2. Data Layer Implementation
- Use the data layer to send structured data to GTM for more advanced tracking.
3. Server-Side Tagging
- Improve data accuracy and privacy by routing tracking requests through your own server.
4. Enhanced eCommerce Tracking
- Integrate with GA4 for detailed tracking of product impressions, add-to-cart actions, and purchases.
5. Cross-Domain Tracking
- Enable tracking across multiple domains for a seamless user journey analysis.
Best Practices for Using GTM
- Keep Your Tag Setup Organized: Use folders and naming conventions to manage tags efficiently.
- Use Fewer Tags When Possible: Reduce redundancy by consolidating tags where applicable.
- Test Before Publishing: Always use the Preview mode to avoid data discrepancies.
- Monitor Performance: Regularly audit your GTM setup to prevent errors and ensure optimal site performance.
- Leverage Built-In Variables: Use GTM’s default variables before creating custom ones to keep your setup clean and efficient.
Final Thoughts
Google Tag Manager is a powerful tool that simplifies tracking implementation while providing greater flexibility and control. Whether you’re a beginner or an advanced user, mastering GTM can significantly enhance your website’s analytics and marketing capabilities. Start leveraging GTM today and take your tracking strategy to the next level!